Monday, 23 May 2016

May 2016/ Berth and transport to Styria

Berth and transport to Styria

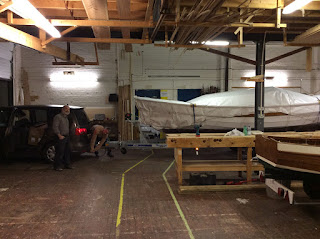
For summer I planned to do get the boat to Styria, where my parents live. As I wanted to spend more time with them and my father has a well equipped - very small - workshop we trailered her there. 

   
Leaving our 2nd workshop in Vorarlberg and Eva's parents


After 8 hours to go, we arrived in Mürzsteg which is a very small village in a mountainious part of Styria.  To get our lady to her new place we needed a tractor cause of the very steep driveway. That was a bit thrilling but all went well and in the late afternoon she was parking right in front of my parents home.

Our new boat yard


as time is precious and we prefer to spend it sailing this blog still needs time to get finished ... 


Thursday, 31 March 2016

March 2016/Construction changes and starting with the interior

Construction changes and starting with the interior


During Easter holidays we stayed again in Vorarlberg for 1 week. Our aim was to produce the galley structure, to do the most important changes according Iains advices and again some paint jobs. As we had already checked out the dimensions of sink, oven and fridge we intended to buy the first part wasn't too difficult to get ready. In the meantime Eva painted the foreship for two times with Epifanes two pack PU.
 
On the left pic you can see the principal form of our galley. To get it ready, I had to make templates first. 
 
our foreship in bright white


Left side you can see the construction changes I made to get rid of the compressionpost.

Nevertheless I decided to produce one just in case..... 


Also this week I produced the base for a small cabinet and the battery box for the engine (the rectangular box beside the centerboard case)


Finally the berth construction took shape


Saturday, 13 February 2016

Jan-Feb 2016/Teaking the cockpit and fitting the flush hatch


  Teaking the cockpit and fitting the flush hatch


As we did the following works always blockwise during holidays I want to complete this blog by describing monthly.

After a few weeks rest we started to work again. Some days before we left  Lyme I got an email from Iain Oughtred with a practicable solution to spare the compressionpost cause we always wanted to get rid of it out of the center of the berth. Iain has a friend who did all the  calculations and Eva and me decided to change a view things therefore. Off course this way to build a boat isn't really the best nor very efficient but now (I did this post 11months later) we are glad for having done.

But let's start step by step. First off all I wanted to finish the teaking. Cockpit-sole, bridgedeck and cockpit-seats were the first part. Without all that pressure to get a boat ready for launch it was much more stressless to work.

I developed a nice way to stretch the cockpit by optic. Therefore I shaped the teakbattens for sole and bridgedeck with a taper from the companionway to the aft.
Next I did the seat-battens as well and glued all with Sikaflex.


When I first worked with Sikaflex teak-decking it was really messy work. But you live and you learn. The second time went much better. And doing straight lines is definitely much easier than curved ones ....


On the picture to the right you can see the holes in the cockpitsole behind the bridgedeck where later the cockpitdrains will be positioned...


After finishing the cockpit-teaking we started to mount the hatch on the foredeck. To avoid annoying problems with tangled sheets we chose a Lewmar flush hatch, which surface ends up completely flush with the deck.

Due to a mistake in the hurry of the last weeks in Lyme the cut out for the hatch was simply too little. Sounds on first sight not really problematic but resulted into a complete reconstruction of the hatchframe. I had to extend the opening and replace a wider frame beyond the already existing decking. Not really an easy job.... (Think first, measure twice....)

It was a real mess but finally the hatch  slid in perfectly and after adding thin additional teak-battens to egalize the decks curve it fits perfectly and completely even with the deck surface. To drain the hatch frame I installed hoses  which later will be connected to valves to let the water run off portside and starboard. 


Tuesday, 22 December 2015

Leaving Lyme Regis


21.12. - 22.12

Leaving Lyme Regis


Preparing our lady for the transport back home to Austria took a little while. Finally she was waiting on the trailer like a parcel of Christo.  The trailer we picked up in Lelystad last week.
Steven was the last member of our course, who was still here. Like Steven was always helpful if necessary, he gave us a hand at this final job in the BBA`s workshop.

Anna, our landlady escorted us and shot this last picture of our departure.
With a lot of different impressions in our mind and heart we left Lyme Regis in the afternoon the 21st heading toward Portsmouth where we took the Ferry to Le Havre over night.

It was a journey gladly without any problems  and after we´ve started from Le Havre at the 22nd at 8 am in the morning, we arrived in Vorarlberg at the Lake of Constance at 1 am the 23rd.

We left the boat there at Eva's family and finally got back home to Vienna in the afternoon.


Saturday, 5 December 2015

Week 01 - the last two days & "launching"-day


30.11 - 2.12.15

Preparing the boat for Launching day


Although I decided not to launch the boat, I wanted to present her in that kind she once will appear. So I fitted pintles and gudgeons for the rudderblade.....


.... test included,


fitted the portholes with Joe`s help


finished the teakframes around the cabin roof ,


put the cabin roof on (just with some screws, to get it off again later)


In the end I was really a bit sad, that we couldn`t finish far enough to launch our baby, but the decision was the right one. She´s a big project and I always knew that she can´t be finished completely in such a short time.

We will do that in Austria step by step.


The BBA Certificate


In a short ceremony we finally got our Boat Building Certificates.

Certificate of City and Guilds Level 3


Our course members
Pete Tysall, Neil Hammond, Mark Dumble, Joe Blathwayt (Instructor), Andy Sulzer (sitting), Steven Adler (in front), Ross Wheeler-Clayton, Mark Turner, Ant Mace, Mike Broome (Instructor)


Sunday, 29 November 2015

Week 02 before launch - Sikaflex, Varnish and amazing results


 23.11 - 29.11.15

Sikaflex, Varnish and amazing results


Sikaflex is an ahesive which seals the deck against moisture. It is flexible, very strong and....


..... terrible sticky!

As already mentioned, the teak planks were really hard to get round the cabin sides. After some flops and failures we got them into position but the Sikastuff was everywhere. Hard to believe that there would be an acceptable result in the end.


In the meanwhile I sanded and varnished the cabin in- and outside 2 times.


After 48 hours we could remove the screws, washers and the spacers.  Then we filled the groves with Sika 290DC and had to wait for 5 more days. We completed the coamings and I put on a few more layers of Varnish.


This 2 component pu coating is fantastic stuff. Extremely hard, UV stable, and with a good brush easy to apply. The only thing is not to use to much paint to avoid rins and don´t rush while painting... and use a mask!


The reward is a beautiful shiny wood texture everyone wants to touch.


5 days over. I couldn´t wait start sanding of the Sika to see the result and it was really pleasing, although there appeared some voids I had to refill later.


Partly all the deck turned up and finally.....


isn`t she a beauty?


Sunday, 22 November 2015

Week 03 before launch - Coamings, shaping the Roof and Teak Decking


 16.11. - 22.11.15

Coamings, shaping the roof and Teak Decking.... 

and the decision not to launch


The plan of this week was to get the teak deck on. While I started to shape the covering boards along the sheer line, Ant produced and fitted the coamings, which will later let us sail dry and well protected.

At that stage I decided not to launch. It was a kind of  the feeling to have lost a race. It was a race against time but in the end I wanted to finish the boat in a good standard on not in a rush only to get it in the water. 


Teaking was one work I´ve been looking forward since the beginning. Together with Ant I cut and laid the pieces part by part on deck. First we temporarily fixed them with screws and washers and Teak Cutoffs as distance pieces.


The lids, sky hatch and coamings  were framed.


Between this work we temporarily fixed the roof to mark the shape and position of the cabin roof beams. I know, it looks a bit odd at the moment, but we just wanted to get roughly the outside lines.


All part from fore to midship are ready to be glued. The radius around the cabin sides was really on the edge and we nearly couldn`t get them into the right position.


Before we started teaking the deck I glued the covering boards. That would give me the frame for all Teak planks and enough stability to bend them around the cabin a far as possible. 


A nicely framed starboard coaming made by Ant